Pages

Friday, December 5, 2014

Retirement and Memories...

No, not me!  Not yet, anyway.  Soon, I think.

I've been ready for retirement for a long, long time.  But, it is a tough decision to make.  There are just so many unknowns!  The big one - will I outlive my money?  and then the one you don't want to think about - waiting too long and missing the chance to enjoy the "golden years".  I waited too long to enjoy retirement with my guy, but I hope to have lots of years to enjoy with family, friends, and my power tools!

But, my boss is retiring, or rather beginning what, in higher education, is called a "transition" year.  He will still be employed for a year, assisting the new president when called upon, helping the president at another local university to grow their satellite campus, and representing the CSU system when needed.  Bottom line, though - come January 1, 2015, he will no longer be coming in to work, I won't be sitting in on meetings with him; he'll no longer be my boss.  I'll miss him!

In addition to being a good boss, he and his wife have become friends.  I'm going to miss seeing them on a regular, frequent basis.  I hope to still spend time with them - at our age good friends are hard to find!

The past couple of weeks have been a whirlwind of special events commemorating their 11 years at CPP.  Tuesday night we had a gala at the beautiful Fairplex Sheraton Conference Center.  One of the things we planned was to have special note cards available for anyone who wanted to leave a personal note for them.  But, we realized we'd need somewhere for those notes to end up and we looked for a special container for them.  When our event coordinator sent me the picture of a handcrafted suitcase-type box and said that this would be perfect, a light bulb went off - why didn't I make the box for them? Although I suspect it will be loaded up and stored away, it might, some day, bring fond memories of the crazy lady who took up woodworking at an old, old age!

So, the box was easy, the lettering not so much!  I need to work on a good transfer method.  What I ended up with is less than professional looking, but if you squint you think it looks old and quaint.  At least that's what I'm telling myself!!

Here's what I made for them.  This box measures about 14 x 17 inches.  It has brass corners, hinges and handles that I oversprayed with some darker metal spray.  It's been stained with several layers of stain to give it an aged look.  I sanded off some of the lettering and rubbed a bit of stain over it to age that as well.  The inside of the box has a felt lining on the bottom.


Happy Retirement Mike and Betty!
I wish you many years of joy and pleasure spent with
your girls, in-laws, grandkids, and the many, many friends you've made over the years.
I feel fortunate to be counted among those friends!


Mike and Betty
Ortiz
Cal Poly Pomona
2003-2014

Sunday, November 23, 2014

Some Home Updates

For the longest time I've been hankering to build and install floating shelves somewhere in my house. After a lot of time thinking about it, I decided that the best place for them would be in my small "water closet", in the space over my toilet.  And, YOU KNOW there's a water line in that wall someplace!  So, in addition to being just as averse to putting holes in my walls as the next person, I   was also worried that I'd drill a hole into a water pipe and end up with a major mess!
So, I've been procrastinating.

Finally, last weekend I'd had enough of being a chicken about this.  I pulled out my stud finders and went to work!  (By the way, the stud finders only seem to work on walls - I walked around my neighborhood and I didn't get one beep on the damned things!  Or, perhaps there just aren't any studs in my neighborhood; that could be it.)

They didn't take long to build, and they're very stable - I'm not worried that they'll fall down!  More importantly, no water pipes were damaged during the installation.

Here's the first one up, and then both of them (with my old, tired towels).  I probably could have added 3 shelves, but as it is I'll have a hard time reaching things on the top shelf!


Then, with a few pretty things added.
(This is a really tiny space so it was hard to get a good picture!)


It's a fact of life that we all spend so much time in this room,
I think it's great that my space is now a prettier place to be!


Sunday, October 12, 2014

An Update on the sewing room and office

It's been a slow, slow summer for woodworking!  And, here we are into mid October and it still seems like Summer.  I did, however, get out to the garage yesterday and today, and the saw blades were turning!  It was good to be out there - I miss it, and am looking forward to spending even more time out there now that the weather seems more like fall.

I finally finished camper daughter's neighbor's sewing room and office niche.  There are still a few knobs to install, but the holes are drilled and T will be able to install those when she picks up the extra few she was missing.  So, I'm finished!

I'm sure a pro (like Don) would have given her a much better finished product.  But, I think it looks nice and it provides a whole lot of functionality.  I tried scribbing the tops for both the sewing room cabinet and the desk top - I'm not the best scriber!  T mentioned that she's already lost a photo behind the sewing room cabinet!  I've got a piece of trim for her to pick up and cut to size.  It's small and flexible so it might cover some of the larger areas and keep things from being lost forever!

So, here's the sewing room.
Those walls were so out of square.  I installed trim to bridge the gap between the wall and the tall cabinet.  There's crown moulding, but darn, you can't see that very well - but it looks pretty!


And the office - in use!
 Three large file drawers, three smaller drawers in the long run.  Small pencil drawer and cabinet in the short run under the window.  There were no studs in that wall with the shelves  -  I'd swear there weren't!  T's hubby had tried to find some and there had to have been 100 holes in the wall.  I had a hard time finding toggles that would work.  I did finally find something that would hold in the plaster.  Old houses!  I don't ever want to build something again that needs installation!!!
(This is in the master bedroom; I made night stands to match, each with 3 drawers - more storage!)


Happy Fall - and Happy Halloween!

Image result for halloween


Sunday, September 7, 2014

Camper Granddaughter's bedroom update

Oh gosh, remember all the before pictures I teased you with?


Let's see them with the afters!


From old frame and desert art, it took adding a shallow box and paint to turn it into a
cute nail polish holder
(I understand this didn't hold all the bottles of nail polish!)


Same thrift store chair!  All it took was one day and 9 yards of $3 fabric to make it oh so chic.
It's a comfy chair for settling in and reading!  


Double "day" bed with 3 drawers on the usable side of the bed and the
side that's up against the wall has 3 cubbies (for use if she ever decides to turn it 90 degrees-I won't make drawers to fit, but she can find some baskets to use there!).  
If she does decide to turn it, we can raise and turn one side panel to be headboard height.


This little desk was more of a project than I thought it would be, but it's just perfect for her room.  She's added a mirror above it and all the thrift store items she purchased and painted silver.

Somewhere I have a picture of her "jewelry coffin" hanging on that wall where you see a night stand- but of course, I couldn't find it in any of the many albums and photo places on and off my computer!  It was a Christmas present this past year and because of it's size (about 18" wide, 4' tall, and 5" deep) Camper SIL named it the jewelry coffin.  He was hesitant to attach it to the wall until now, 
but it's finally up and with it's 4' tall mirrored door, it's being used every day!

Her mom and dad had the room painted, added new drapes, bought a few decorative items and with our thrift store finds - voila!  A little bit of Paris! 

What a treat to help make her room ready for a High School student.
Happy High School years, sweet girl!  


End of summer "catch-up" with the Loggers!

Hi all.

So much has happened since my last post - a lot of work, and happily, a lot of play!

I waited and waited for a timeshare week in Hawaii to become available - and by the last weekend in August nothing was available!  So, I decided a visit to logger daughter and family was in order. Their area has been burning since the beginning of summer, and is still burning.  The air quality is horrible and I was hoping that when I visited most of the fires would be out and I'd be able to breath the clean fresh air they usually have.  That didn't happen - the fires are still burning and the acreage lost to this fire is devastatingly large.  But, on to the visit - I had a wonderful time.  The kids were still out of school so I had time to visit with them, too.  Logger SIL, although unable to work his normal job due to fire danger, was busy helping homeowners in the area clear the area around their homes and logging some of the trees that needed to be logged before they burned down!  We had no real build agenda for this trip so Logger daughter and I had a good visit, too.  I managed to visit with my sister-in-law and with a friend from the area.  We picked wild blackberries, too!  Yum.

And, of course, no trip there would be complete without some sort of home improvement job.  So, I "cleaned up" some of the things that were just waiting for someone to have some time to finish up.  And, remember, when I'm with logger daughter, there are no quick trips to Home Depot or Lowes!  If I can't find something to use in SIL's garage or in his wood pile, then it doesn't get done.  So, using what was there here's what we did:
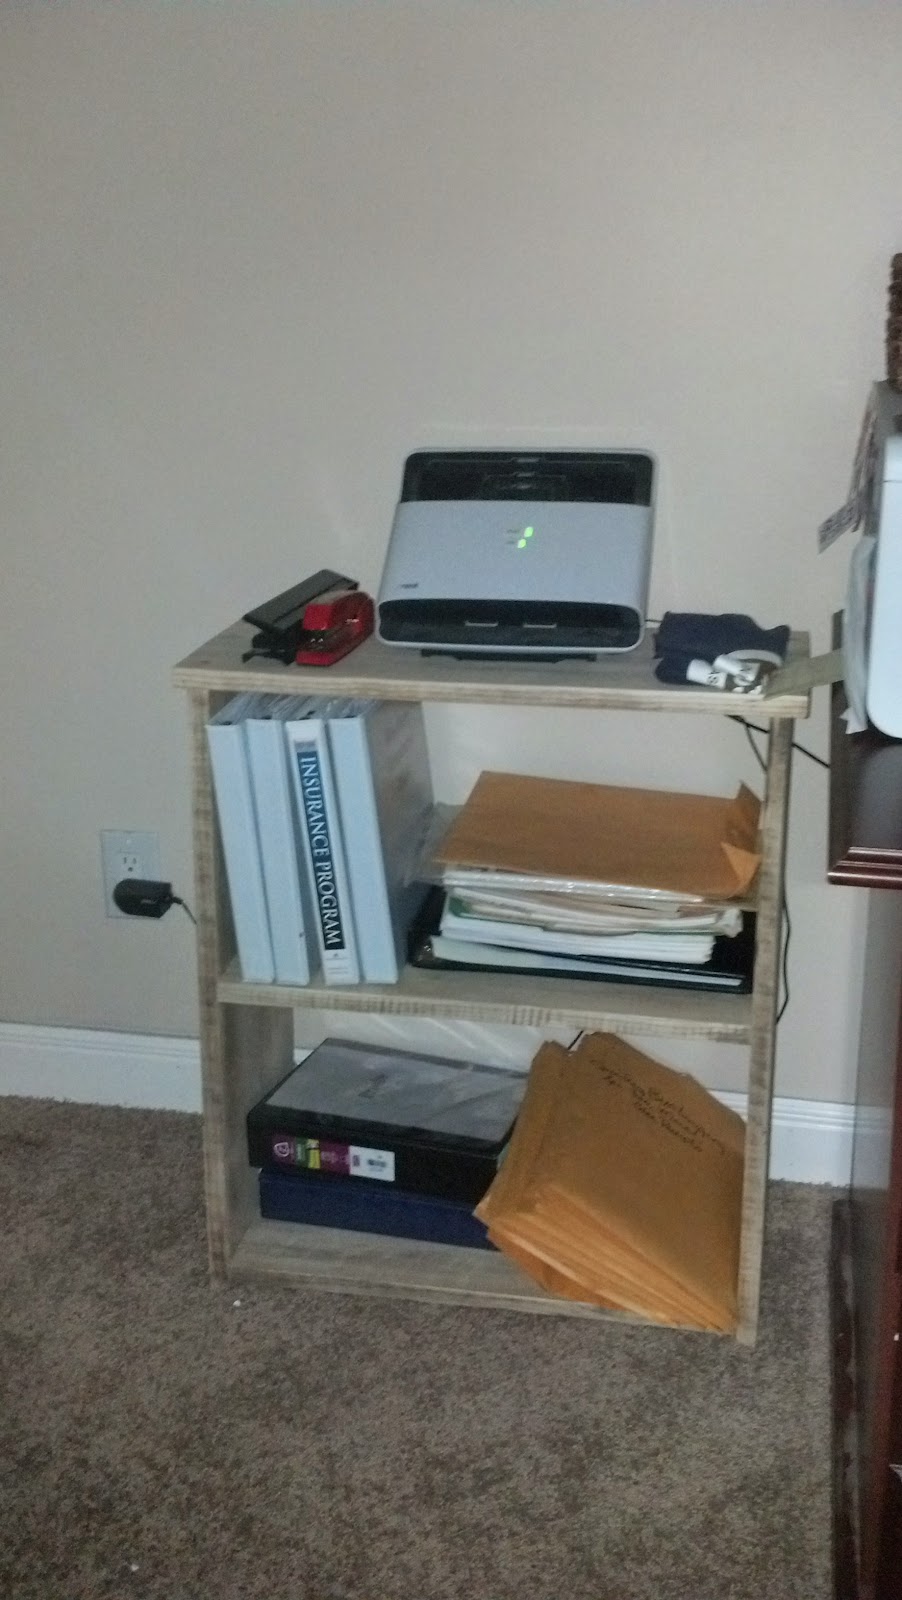
Small bookshelf for master bedroom - to hold business folders and scanner.

Painted door trim - 2 doors - in laundry room.

Painted edges of shelving built and installed a year or so ago!

More painting - drawers built for boy's closet during a previous visit.

More painting - drawers built in granddaughter's closet during a previous visit.

This old style phone didn't fit on the phone face plate and during a previous visit I had tried to make it fit - that didn't work and it was hanging from a loose screw.  I built a raised box like thing to install the phone on to, and attached that to the wall with a french cleat.  It covers up the mess that I'd made last trip!

As of today, September 7th, the fires are still burning - thankfully, the logger family is safe, but so much of the beautiful area has burned and the forests will never be quite the same - at least not in my lifetime.  I'm praying that they have a long heavy rain storm - sooner rather than later!

Monday, August 4, 2014

It's been awhile...

I don't have a darned thing to post about.  How boring is that??  I have been working - hard, building something for my oldest granddaughter.  She turned 14 in July and is heading to high school in just a couple of weeks.  She wanted a new, more sophisticated bedroom.  So, I'm working, working, working...It's big stuff and it's driving me crazy!  

Here's a peek of a thrift store desk that I rebuilt to fit her room - that little breadboard like thing on the top right is where Miss Nail Pro will be perfecting her art!  The cabinet below just might fit her sewing machine and the drawers will hold just a multitude of important things!  


Here are some before pictures of some other projects - After pictures will follow soon!  You'll never guess what we've done with that frame!


And, I've finally been able to install the desk unit for T, Camper daughter's neighbor.  Not quite finished, just waiting for her to paint the wall!  I've never seen so many holes in a wall before - finding a stud is quite difficult in older homes!  If got to hand it to Mr. T - he kept searching!  I'm not much of a painter - just like I'm not much of a finisher.  But, I figured I could fill holes for T so that she could sand a bit and put a nice clean coat of paint in her office area.  Then I can finish the installation of her shelves.  


Shelves are stained, and will be above the drawer units.  More pictures to follow when I finally finish!

I also installed the upper for her sewing room - another thing older homes are known for are walls that are so far out of whack it's darned near impossible to stand a cabinet up against a wall and get it square and plum!  The space between the cabinet and the wall goes from 1/4" at the base to 3/4" at the top.  I've cut some trim that might work, but my crown moulding will definitely need to be recut to fit!  Maybe I'll post pictures of that once I get it in and it doesn't look too odd! 

The result of all this work is one beat up body!  If I ended up in emergency unable to talk, they'd have to assume that someone had beaten me!  Bruised and battered - and worn out!  Normally I don't feel like I'm 64, but this week, I have to say, I feel older (maybe not 64, but older!).  I'm just not up to these big projects.  But, I've got to finish.  I hate a project that isn't complete.  So, I'll be back at it tomorrow night.

Until I have more pictures, that I feel good about sharing, how about these?  My Fuji apple tree is loaded with apples.  I think they've got a few more weeks until really ripe, but I've eaten a few of the apples that have fallen!  They taste great - and the tree is just beautiful.


Fall's coming and I don't even remember having a summer!

Wednesday, June 25, 2014

Built ins and then some!

I've been working on some things for Camper daughter's neighbor, T.  You might remember that I made a built in sewing table for her about a year and a half ago.
Then I built a table with drop-down sides for her that she uses as an end table when not being used as a cutting table for her quilting fabrics.  She recently told me she was ready for me to build some cabinets for her office niche in her bedroom.  And, she also wanted a built in cabinet in the sewing room, something to hold the piles and piles of fabrics that she has!  And, she told me she might go get some night stands to replace the round tables she was currently using, something that would actually hold some of the stuff that was taking up the entire table top and the floor around it.

So, how best to do this and not disrupt her sleeping and sewing patterns??  I knew we'd need to move her things from current inadequate storage into permanent storage in an organized way, I just wasn't sure of the best way!  Finally, I decided I'd build in the storage in the sewing room.  I thought that might give her some additional space for things that are now in her bedroom - if we could clear some space in the bedroom it would sure be easier for everyone while things are being built.

One major hurdle would be to get the big piece upstairs and around the corners of the landings. Building it in two pieces is how I handled that challenge.  Then, because they were being built in, I didn't put a back on them - which made them light enough that I could wrangle them off the truck and up the stairs.  Don would never have built anything without backs!  But, a girl's got to do what a girl's got to do, right???


 Then, another worry was that the drawers, each of them 30" wide and 14 inches deep, had to be sturdily built and be installed with slides that would hold the weight of all that fabric.  So, looky here - I pulled out my dado blades and cut dadoes for 1/2 drawer bottoms.  Then, I installed the heavy-duty, full extension European drawer slides.  I'm kind of wondering if I should have installed them 1/2 way up the drawer body rather than at the bottom, but they work this way so I guess it will have to be okay!


Drawers installed - big, big, big!


I've installed the base cabinets and the top, but still have to build a piece that will sit on the top and reach to the ceiling.  I'm envisioning it with a glass insert in the door so that T can store her prettiest fabrics in that upper.  The wall slants on that wall so I will only be 22" wide, but then she'll have a large cabinet top available for a TV or other decorative items.  
I used pine plywood for the bases, which isn't always pretty or easy to stain.  So, I painted the cabinet base white and stained the cabinet top to match her sewing tables (Early American).  I think it looks pretty.  As soon as I've built and installed the upper cabinet I'll post pictures of the final project.  

My plan was to start on her office modules next, but I had a bunch of scrap plywood left from her first job - not quite enough for the office stuff, but enough for a couple of night stands.  Along with some white-powder coated drawer slides and a bit more pine boards that I had to purchase, I was able to make these two nightstands for her.  
These were spray painted Heirloom white and the tops were stained with provincial stain.
I delivered the nightstands and then I stalled!

It's been several weeks since the nightstands were done, and I've finally completed all the other pieces.

The cabinet that will sit on the sewing room cabinet base.  I've put a primer coat of white paint on this baby, but the finish coats will be done by T.  


Then, I lost my notebook with all the measurements for everything else. 
 It was just an old notebook, but I'd found it after Don died and it had a few pages of notes and things that he'd written. I hated that I'd lost that.  And, I didn't have measurements!  I had some basic information, and I could start.  Then, I contacted T and had her take a few measurements for me, too.  
Hopefully, when I go to install them, everything will fit.
Keep your fingers crossed!

So, on to the built in desk unit for the office niche in the master bedroom.  This will be made up of several parts that will have to be carried upstairs and around a small landing.  I had to figure out how to build everything so that could happen.
These two bases were first, one with two file drawers, the other with 
one file drawer and two smaller drawers.  
I used the heavy duty drawer slides on the file drawers and the powder coated basic slides on the other two.  These will be joined together once I get them in the room.

  
Here, those two cabinets are connected.  On the left, is a base that will have a small drawer and a door.  You can see the top pieces and the support pieces to hold everything up and together.

Since these pieces are going into the bedroom, they are finished to match the nightstands.  Provincial stain on the top, Heirloom white paint on the bases.  Handles have been selected by T, and will be used on the nightstands, too.


 I'm hoping to get these installed soon and I'll have pictures of the finished project to post!

When you think I'm just being lazy, there's a pretty good chance that's exactly what's happening - but, not this time!  I've been busy, busy, busy - just slow!