Shortly after Christmas one of the young women bloggers, Jen of House of Wood (http://jenwoodhouse.com/), blogged that she had plans for so many different furniture pieces that she had designed and she lamented that she just didn't have time to build all of them. I responded to that post that I'd love to build one of her plans for her. I really wasn't expecting to hear from her, but lo and behold, she did respond. She'd looked at some of my posts and complemented me on my large storage cabinet for my sister. She also include a picture from one of her plans and asked if I'd like to collaborate on this project with her. Well, of course I did, Silly!!!
She hadn't yet included the plans so I responded to her to send along the plans and I'd happily get it built. When I got the plans I was in the middle of my big kitchen project and CA was in the midst of the stormiest winter in years. Don't get me wrong, I'm happy for all the rain, it just put a big crimp in my working hours! I work in the garage and if I can't move projects that are complete or in progress out on to the driveway while I work - I can't work! I did go buy lumber so that it would have time to dry a bit more and acclimate to my work space. But, that's as far as it got until these past couple of weeks. Then I got busy!
Jen's plan looked simple enough, but I'd already run into one problem when buying lumber. Jen's plans called for the legs and table structure to be built of 5 x 5s; Home Depot doesn't carry 5 x 5s. I hmmmed and haaawed and finally just bought 4 x 4s. I figured that although it wouldn't be exact, it would give Jen an opportunity to see the table finished.
I ran every piece of wood through the planer - several times. All of the 4 x 4s were prepped to exactly the same size, all of the 1 x 6 material was also smoothed the the same thickness. This did help immensely, but it was still a bear to put together (for me anyway - I'm old!).


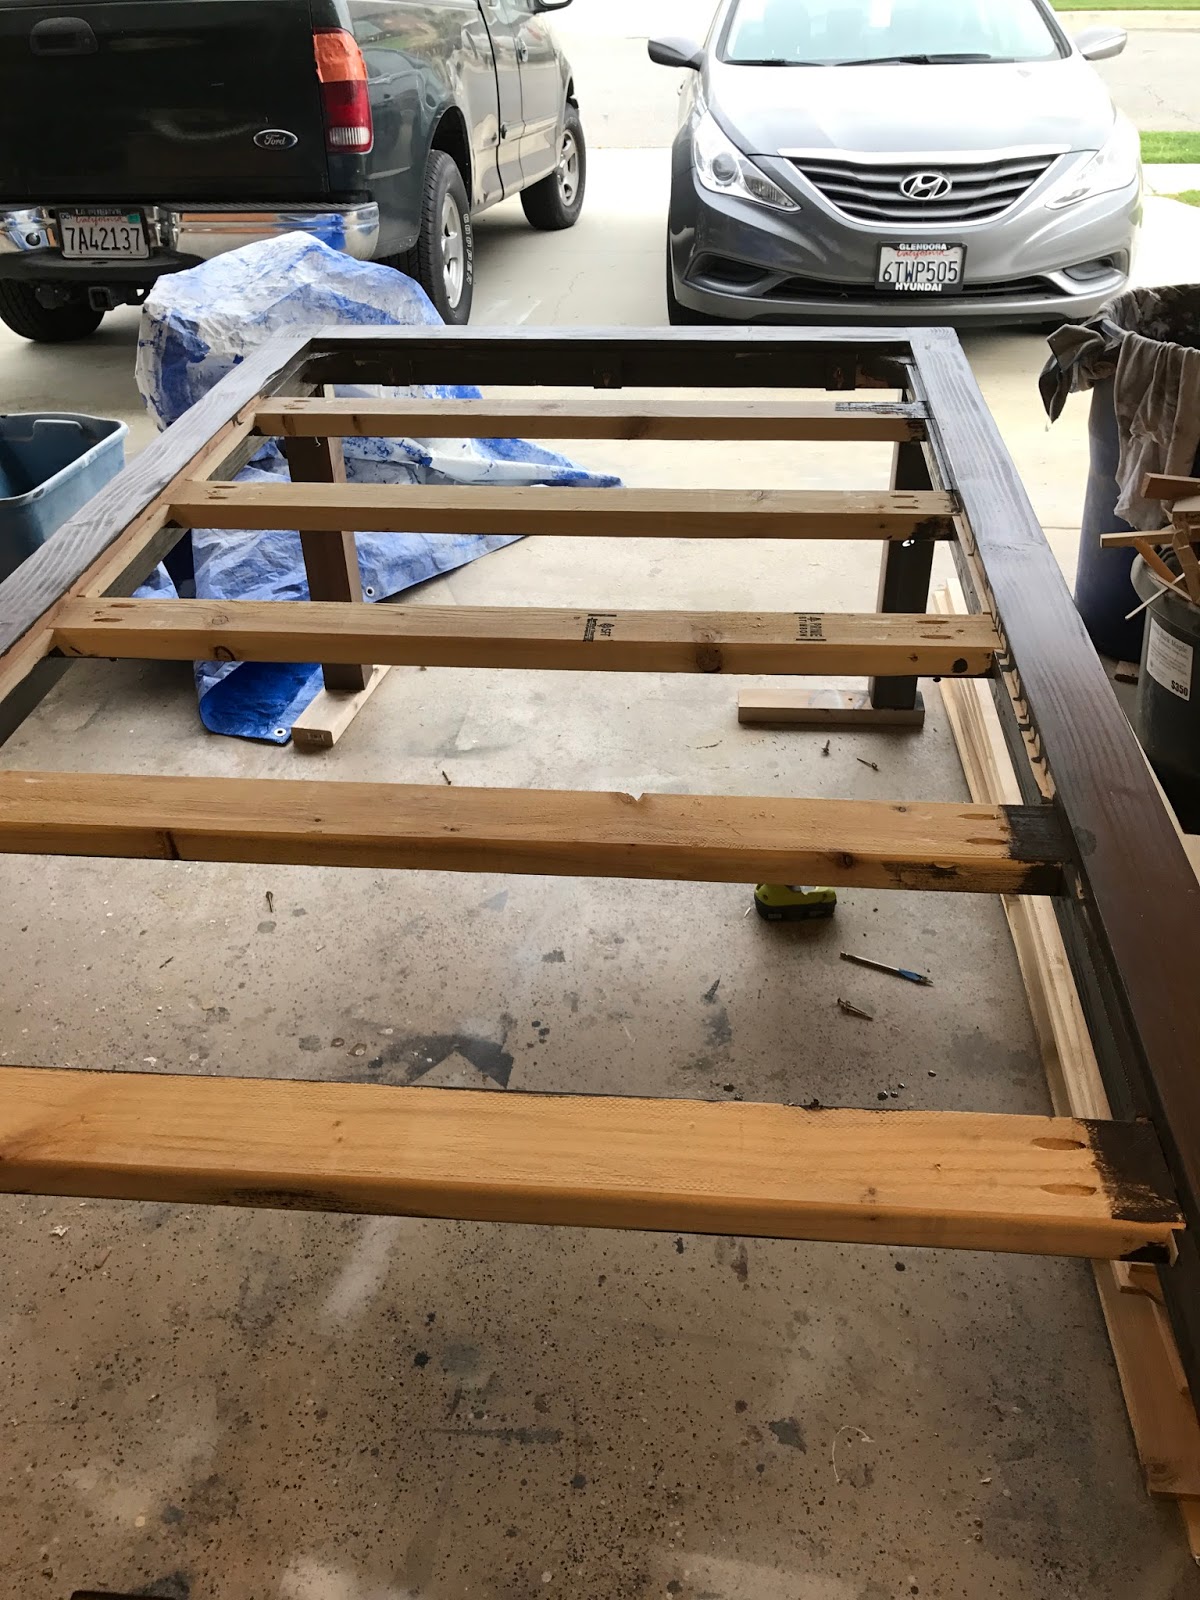
The plans called for glue and a couple of 4" screws to hold the legs tight to the side and end pieces. I just wasn't sure that this was enough support for the weight. It might very well have been, but I always err on the side of caution. I decided that I would add l-brackets to the underside of each cross piece and attached those to the legs (I painted them a flat black to finish them off).


The brackets did add to the support and added an unexpected bonus - they helped me to keep the legs/side and end pieces square during the build. When I joined all of the pieces together to form the table I did have problems maintaining square but I did the best I could and dealt with any adjustments after the fact. I admit, that was really, really hard to do as the glue had begun to set up and those heavy, long pieces were all joined together.
I finally put a long pipe clamp from corner to corner and cranked on it until square was achieved. Then I let that sit for a day to make sure I had as good a glue joint as possible. (as an aside, I have very few clamps and for this table I needed clamps that were at least 96" long. I have two bar clamps (given to me by a good friend) and decided the simplest and cheapest option was to go buy two additional 5' pipes and a couple of connectors. Home Depot was very nice and cleaned up the threaded end of one of the original pipes so I ended up with 2 additional 10' pipe clamps.)


Then I started working on the planked top. The boards were already planed and ripped to size so I started adding biscuit cuts to all of the boards.

I glued and joined 4 boards, and 2 sets of 2 boards. After another day of sitting clamped up, I joined all the sections to create the large table top. After more time spent waiting for glue to dry - an activity very similar to waiting for paint to dry - I was able to sand, and sand, and sand some more. I like for the bottom of a table top to be just as nice looking as the top. When I use pocket screws sometimes that doesn't happen (unless I decide to fill all those pockets!), but this top used just glue and biscuits. So, except for a few more divots the bottom was finished and the top flipped for more filling and sanding. There are a couple of sap pockets, knots and gouges in the top that I didn't try to fill or sand out; I like the character these add to the finished piece.
Once the top was finished I had to insert it into the opening in the table - between the sides and ends. I added 2x4 support pieces across the width of the table and corner braces, all set down 3/4" from the top to accommodate the table top. Then I slid - or tried to slide - the top into this open space. And, found that my "square" was quite a bit different than the table's "square"! What I should have done - oh, hindsight what a glorious thing you are! - was to make the table top a tad longer and wider than needed. Then just laid the top over the opening it needed to fit into, and from the underside trace the outline it needed to be cut in order for it to fit. But, that didn't happen. That's when I decided that I needed to sit in the sun and read, and hope for some genius idea on how to "fix" my beautiful table (Yes, now it's 90 degrees in the middle of the day, and we're all longing for more rain!).

When you join wood lengthwise and crossways, you have to take into consideration the natural movement of the wood. I understand about 1/10th of a percent of what I should know about this. But, I knew that I was going to have problems with that table top if I couldn't get a more equal space around all edges. And, hopefully, I could keep the gap to less than 1/8 of an inch. I did figure out how to do this. No, I can't tell you how or you'd spend hours trying to find my "fix" and I'd rather you think that I was able to make this correction just using my extremely honed woodworking skills.😜


Once that was complete there was more sanding, and then I decided that with the slight gap around the edge of the center table panel there just might be an opportunity for spills and crumbs to find their way from the table to the floor, I decided to add small pieces between each of the supports attached to both the long and short cross pieces. (You can almost see these in the picture above that shows the cross supports.) I also had to find a way to attach the top to the table base. Again, wood movement comes into play. I finally did something that I'm pretty sure will work. I made some things to fit around my extra small boards on the ends, 3 of them on each side. They are attached to the ends of the table. Where they are screwed into the table top. I predrilled a hole a bit larger than the screw that would go into the table top. I used a washer to keep the screw tight at the end. I think the extra space in the screw holes will allow for wood movement while still holding the top stable.

I did the same extra large holes predrilled into the cross pieces, and using a washer and screw put a screw up from the bottom and into the table top boards. I did see something like this on a woodworking site, so I'm pretty confident that it will work.
After more sanding and smoothing, and filling and sanding, the table was now ready for stain and finishing.
Pine has a tendency to be blotchy. I tried something new this time and added a seal coat of shellac before I applied any stain. This worked really well! Once the shellac was dry I sanded the top again, wiped it down, and applied a coat of Varathane Briarsmoke.
By itself, Briarsmoke is a pretty grayish/brown color. But, it seemed a bit flat.

So, I let that dry, lightly sanded, and added a very light coat of Varathane Sunbleached. Then, after another sanding and wiping, I added a final coat of Minwax Early American.

After the stain color was where I wanted it, I applied 4 coats of satin polyurethane and a final coat of gloss polyurethane.
I'm not the best at staging pictures, but I did have my Camper Grandkids come over and help me move it out of the garage!
It almost looks small in these pictures-it isn't! It's 90" long and 48" wide! You could easily sit 10-12 people around this table.

My photography skills do not do justice to the beautiful color of the finished table. Warm brown with a hint of gray.


I had a good time building this - it is beautiful. Its clean, modern lines meld perfectly with the common woods used for the build and gives it a modern, rustic, Restoration Hardware/Pottery Barn feel. It's a table for family and friends to gather.
Isn't he handsome??

Thanks, Jen, for sharing your talents with me. I hope you get some satisfaction in seeing your design come to life! And everyone else reading this, be sure to check Jen's blog - she does amazing things!
PS: This table is for sale! You know me-I have way too many tables as it is! Message me if you, or someone you know, is looking for a big family table - Easter's coming, you're going to need a big table!
So cool! Love the finish. It's great to hear I'm not the only one that encounters challenges during the building process!
ReplyDeleteThanks, and check back anytime you need a reminder that challenges abound here!! In a perverse way, I think I get the most pleasure from the challenge!
ReplyDeleteI think you did an excellent job it turned out beautifully!! You should be proud :)
ReplyDeleteThank you.
Delete