In between all the stuff she has to do, she helps her friends with their decorating dilemmas. Currently, she's helping some very nice people furnish and decorate a band new home. They've been hit with some unexpected move related expenses so their decorating dollars have been cut to almost nothing. (Haven't we all been there?!)
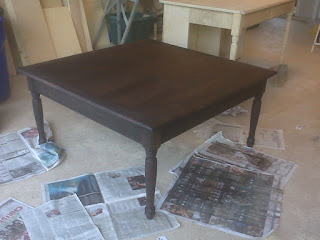
Anyway, my YF suggested that they needed a very large coffee table to replace their old one. Now, I've made a couple of cabinets for my YF and she asked me if I could make something for them. She'd been looking and most of the big tables were going for anywhere between $575 and $1600 dollars. I'd recently seen a plan at Ana-White.com for a coffee table that I was sure I could make for less than $575. Here's what I did last Sunday.
 |
| I wish I had a better camera in my phone! This
really looks so much better "in person". It's 42" x 42"x 20 1/2" tall |
 |
| I attached the legs to the apron first. |
 |
| Then, using glue and pocket hole joinery, attached the birch trim to the birch plywood top. |
 |
| Here it is with the table top attached to the base. It has a coat of Bombay mahogany on it. See how read it looks next to the espresso color? |
 |
| Here it is with the espresso stain rubbed in to the top (looks almost light brown here - but it really is pretty dark!) |
 |
| You can almost see the detail of the top trim; it's about 2-1/2 inches wide with mitered corners, and a round over routed edge. |
 |
| I also added a detail to the apron - can you see it? I ran it through the table saw with the blade raised just an 1/8 of an inch. Just a slight indent 1/2 inch up from the bottom edge. |
 |
| And, here it is all stained, with probably 2 coats of satin finish polyurethane. Oh darn - there's not enough sheen on that table top! |
 |
| This picture shows it with a couple coats of semi-gloss polyurethane. Still not enough of a sheen for me. |
This was a fun one. Fairly easy (although I always manage to mess up something!) and it was quick. I should probably mention that I usually don't finish things (remember - I hate to finish!). However, the people I built this for don't finish things either, so I told them - and this is just about word-for-word: "I don't finish, but I'll smear a coat of stain on it for you". I think it turned out pretty well and should prove to be a pretty, functional piece for them for several years (or until they add it to their burn pile!).
Done and ready for pick up!


Wow! I'm so impressed! That is a beautiful coffee table -- and I love large coffee tables. They are such an integral part of the living area; and so functional.
ReplyDeleteWow! I'm so impressed! That is a beautiful coffee table -- and I love large coffee tables. They are such an integral part of the living area; and so functional.
ReplyDelete