Actually, it wasn't hard, but it was certainly challenging. Which for me is a good thing (if you can get past all the mumbling and swearing that goes on when I challenge myself).
Here's the thing: small kitchen, about 10 x 10 L shape. Original kitchen cabinets are really, really old - the house was built in the 50's (back when I was born, so yes, that qualifies it as being old!). Back then, kitchens were built for different sized appliances, and in this case included a space for a washing machine in the kitchen - no washing machine sits in this kitchen now, and there aren't any cabinets in that space either!
 |
| This is a very rough drawing of how the kitchen was. That bank of cabinets you see over the stove wasn't really cabinets - just a "front". And the cabinet over the fridge was 12" deep and was missing a door. |
 |
| Another rough sketch of the areas I planned to fill in. Originally, though , I was going build open shelving in upper areas, and try to match the existing door and drawer fronts on the base cabinets (just a few). |
Disclaimer #2: Cheap makeover means that I used up every plywood scrap I had regardless of thickness. Some cabinets were made with 1/2 material, some with 3/4" material, and for some, I used both sizes! I figured most of that wouldn't be visible and a coat of paint would work miracles!
Disclaimer #3: Square?? Still can't get that right!
Okay, so I built the cabinets, took them over,
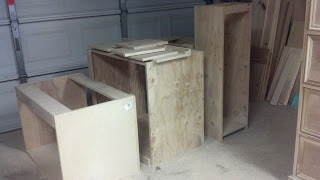
and of course they didn't fit! Too tall, too wide, too deep. So, I loaded them back on the truck, unloaded them at my house, reduced the width of one and the height of the two base cabinets and the upper cabinet. Because of the odd walls, the depth needed to be adjusted. Took them back, they fit. The electrical had to be moved to accommodate the new microwave cabinet so I wasn't able to permanently install the cabinets. My work was done for that weekend.
Over the next week I built another couple of uppers and worked on trying to match the doors. That turned out to be a real problem for me. The door frame had beading in the center, and a rounded edge, the panel has kind of a flared edge detail. I just didn't feel comfortable doing that on my saw . I'm still working on my routing skills (read: still kind of afraid of my routing table). And, I decided that painting these old doors was going to be just as my SIL is fond of saying "like putting lipstick on a pig". So, I knew I could make a simple shaker style door with a flat 1/4 inch center panel without having to use my router. There were by this time, only about 20 doors and 9 drawers - how long could that take, really?? As it turns out, it can take a fairly long time! But, I soldiered on and eventually, finished all of them.


Old door and drawer front.
This was what was hidden in one of the walls - Camper daughter and I did a double-take when we saw that yellow and black stuff. Doesn't it look kind of like a snake?? We thought it did!

Here's Camper daughter being silly as she cooks dinner for us - as we worked around her!

Here's Camper daughter being silly as she cooks dinner for us - as we worked around her!
See SIL standing behind the stove?
He's working on a new electrical outlet -there were only 2 in the entire kitchen!
He's working on a new electrical outlet -there were only 2 in the entire kitchen!

 |
| You can see the old, existing cabinets. They are made of knotty pine. New deep cabinet over the fridge, a "real" cabinet over the range and one filling in empty space to the right. And, the microwave is finally where it belongs! |

New base next to stove - before, that was all empty, wasted space.
Cookie sheet storage in the new base plus an additional drawer, and the upper for spices and oils and stuff, oh my!
Cookie sheet storage in the new base plus an additional drawer, and the upper for spices and oils and stuff, oh my!

Cabinet over the refrigerator & new side panel that makes it look kind of like a built in! There was just a 12" deep cabinet here before - and one of the doors was missing. If you know Camper daughter, you know that at 5' tall she wasn't reaching anything stored way back there!

This is where, originally, there was space for a washer. That cabinet is about 37" wide.
That's an additional 3 feet of counter space!
Now there are two deep drawers, one with a center divider. They can store pots and pans in the bottom drawer.
Oh, and see that shelf below the existing upper cabinet? Initially, that was the plan - that plan changed along the way and you'll see what we did in later pictures.
 |
| Who is that fat old woman who thinks she can build cabinets??!@#$? |

I took all the doors and drawer fronts over to the house and set them where they were meant to go. As often as I measured, I still wasn't confident that they were right! But, I had all of them, and they covered the openings. Good to go, right? Weeeelllllllllllll, yes, but I later learned there was more to measuring them to just "cover the opening".


Once I knew the doors would work I loaded them back into my truck and took them home. Once back in my workshop I sanded and filled, and sanded some more. Then they were ready for the first coat of "bonding agent".
We used a paint made by Rustoleum for use on cabinets. It consists of a deglaser (to use on existing cabinets), a bonding agent (the color coat), a glaze, and a clear, protective finish.

Just look at how strong Camper daughter is! Here she is helping to remove the dishwasher.


 |
| And, here she is - well, not sure what she was doing right then, and maybe it's best that we don't know! |
Here we've started painting the interior of the cabinets and preparing the exterior for painting.


 |
| Oh, look! Here you can see the base /bonding coat, which is "pure white". (That's Legal Doc in the lower left corner, giving his approval of the project so far!) |
Let's see, it's Oct 16th today. I started building cabinets on August 10th, so this has been going on for over two months. But, it's done! Camper SIL has worked every weekend to complete the electrical, plumbing, tiling the counter and back splash, appliance installation, flooring installation, removal of the wall between their tiny kitchen and living room, repairing and texturizing the wall, adding new trim and painting or staining everything.
I'm so proud of both of them for working through this and completing the job! It was hard work, stressful to live through, and exhausting! (oh, maybe I was the only one that dealt with all that!) And, on top of that, the kitchen and living room look great and they're happy with their redo!
I want to finalized this post, but I still don't have all the pictures. So, I'm showing you just a few of them and will add more soon. To remind you of where we started:
FROM THIS

TO THIS


No comments:
Post a Comment
Thanks for commenting!