I'm not sure how it happened (ok, I just read the measurements wrong - no big deal, right???), but the width of this table was only 33". It really worked just fine for dining, but the problem was that with plates on each side of the table there was no room for serving dishes in the center of the table. When we ate at the Docs, it was always buffet style!
Several months ago they mentioned that they might want to increase the width of the table. We talked about just making a new top and replacing the original top with that. However, I wasn't sure if the base was wide enough to support the additional 7-10" they were looking for.
I didn't jump right on this project, but after 5-6 months I started feeling bad and brought it up again. I asked if they wanted the same style or something different, and most importantly what size they wanted the table to be. They came up with the size and said they were open for something different. During the time I'd been thinking of this I came across a web site for a designer of some very interesting furniture pieces. (http://thedesignwalker.tumblr.com/post/127306051246/meyer-von-wielligh-furniture) I absolutely loved a leg that he'd used on a table and showed that to the Docs. They loved it, too, and decided that they liked not just the leg, but the table. Here's what started this whole, challenging process:
Isn't that the sleekest, simplest leg EVER??? Well, I thought it was cool, and so did they; I had a starting point. I wasn't sure I could pull off this leg - and I really didn't. But, I came kind of close. It took a lot of thought,
 |
| My starting point - which underwent several changes when I just couldn't work out the angles!!
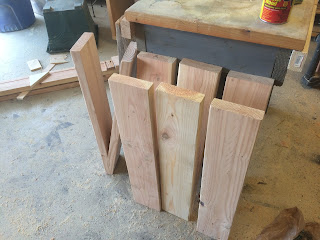
A whole lot of planning and trial runs:
 |
A whole lot of glue:
And sanding:
And, then I had the table top:
And, then I had legs:
So, finishing went like this:
- Apply Minwax golden oak stain, let dry overnight.
- Sand off most of the golden oak.
- Apply Minwax weathered oak stain, let dry overnight.
- Sand off most of the weathered oak stain.
- Apply another coat of Minwax golden oak stain, let dry overnight.
- Sand off most of that stain.
- Wipe off fine dust with damp cloth, let dry.
- Apply coat of polyurethane, satin finish, and let dry overnight.
- Lightly sand and wipe clean
- Apply coat of polyurethane, satin finish, and let dry overnight.
- Lightly sand and wipe clean.
- Apply coat of polyurethane, satin finish, and let dry 2 hours.
- Apply coat of polyurethane, satin finish, and let dry overnight.
- Lightly sand and wipe clean.
- Apply coat of polyurethane, satin finish and let dry 2 hours.
- Apply coat of polyurethane, satin finish and let dry.
- DONE!!!
Then, build bench and finish as above! (did reduce the number of coats of poly to 3! - call me lazy!)
I delivered the table and bench today, Father's Day.
They are very happy with it. The table is a good mix of their rustic and modern style, is sturdy - DIL Doc can dance on the table if she wants, and it's big enough to easily sit 8 - 10 with room for serving platters on the table! I'm happy to have challenged myself and followed through to the finish - the math for this one had me wishing I'd paid more attention to geometry in high school (well, in grade school, too - even a better understanding at that level would have helped!!) And, I made sure that every inch of this sucker has been sanded smooth - so, Little Doc can crawl and stand around this table without worry of splinters.
I'm looking forward to dinner at the Docs!


No comments:
Post a Comment
Thanks for commenting!